Visible Ores Texture Pack 1.21.9, 1.21.8 → 1.20 - Free Download
If you’ve ever spent hours mining in Minecraft, you know the struggle: endless caves, dimly lit tunnels, and the constant challenge of spotting valuable resources. That’s where the Visible Ores Texture Pack comes in. This fan-favorite resource pack gives ores a glowing, highlighted look that makes them stand out instantly from stone, dirt, and deepslate.
Unlike full-blown X-Ray packs that break the balance of survival mode, the Visible Ores Texture Pack enhances your gameplay in a fair, natural way. Players love it because it keeps Minecraft’s original charm intact while making mining more efficient and enjoyable.
In this guide, we’ll dive deep into everything you need to know about the Visible Ores Texture Pack: its features, how it looks, comparisons with similar packs, compatibility, FAQs, and why you should try it today.
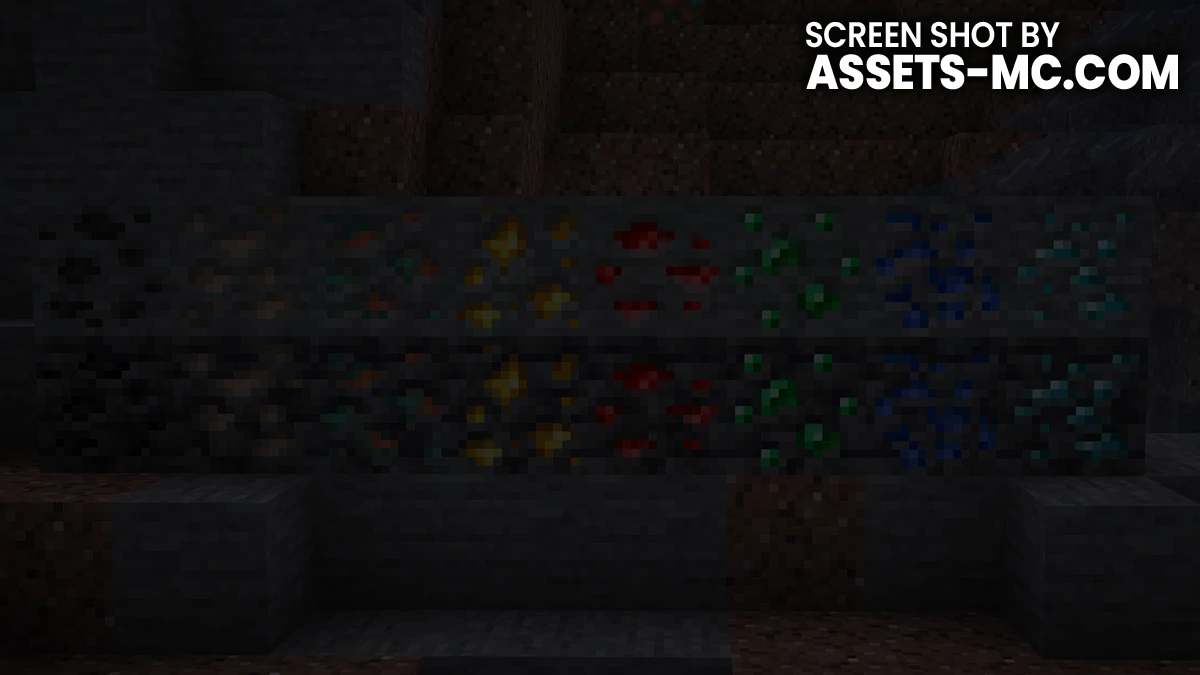
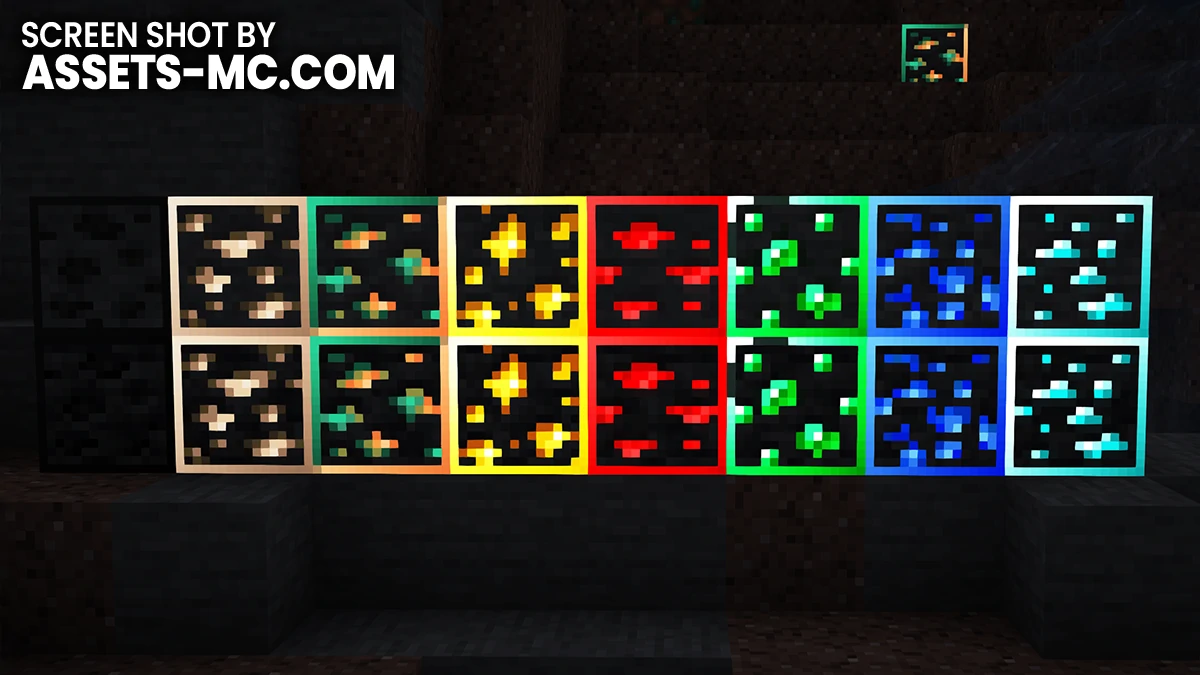
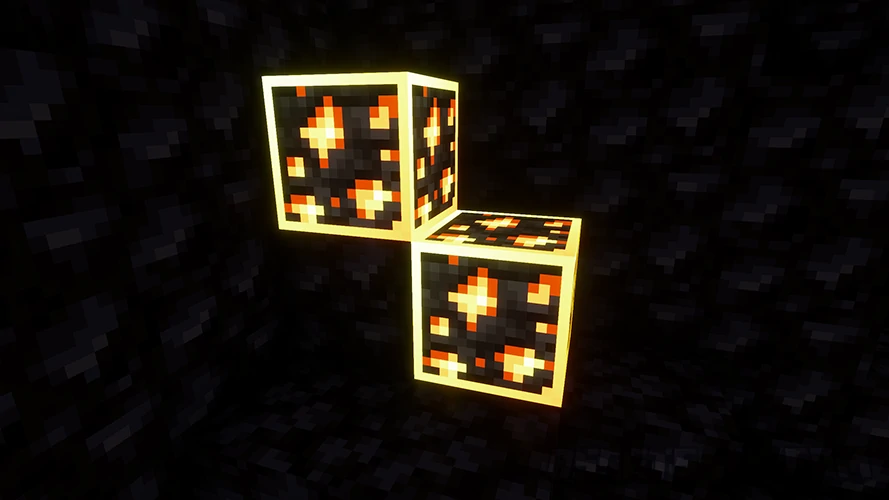
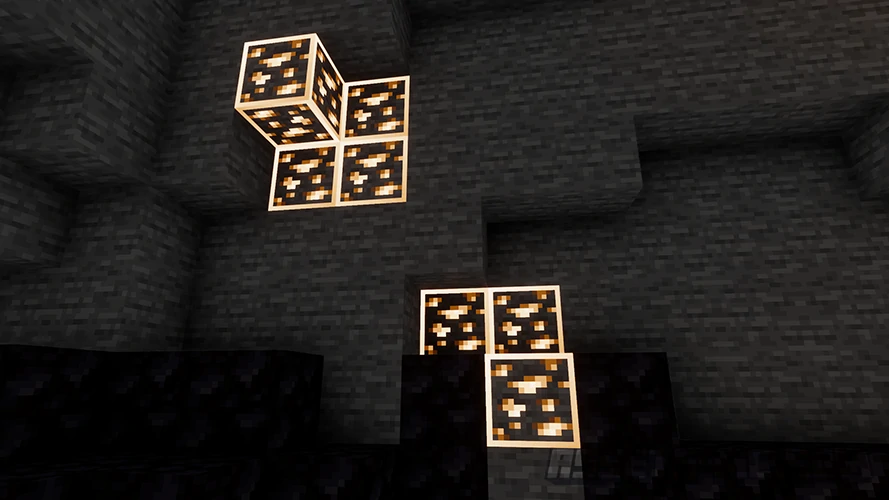
Before & After Comparison
Compare the appearance of Default Resources to Visible Ores.
Features of the Visible Ores Texture Pack
So, what makes the Visible Ores Texture Pack special? Let’s break down its core features:
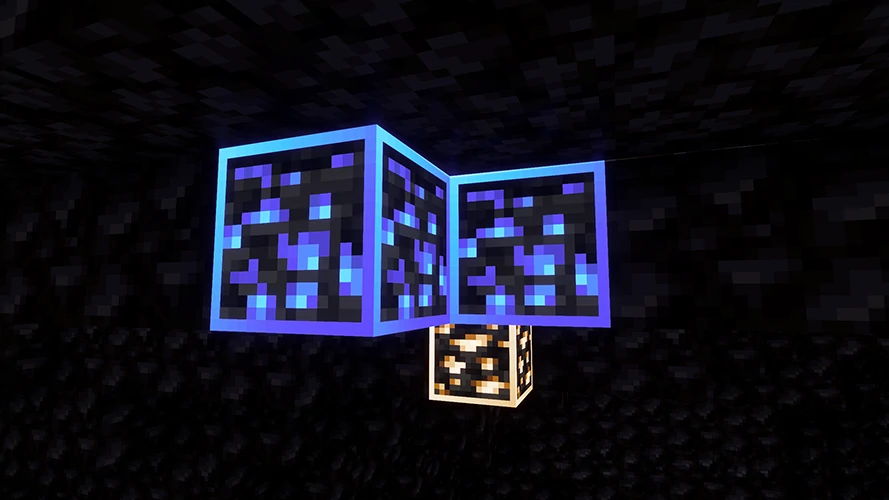
Glowing Ore Outlines
Each ore block is surrounded by a subtle, glowing border. This means diamonds, emeralds, redstone, and even coal are much easier to spot in dark caves or dimly lit strip mines.
Improved Visibility in Caves
Torches only do so much underground. With this pack, ores pop out against the dark stone, making it easier to navigate caves without missing valuable resources.
Fair Gameplay Advantage
Unlike X-Ray packs that reveal hidden ores behind walls (which most servers ban), the Visible Ores Texture Pack only enhances what’s already in your field of view. This keeps the game fair while giving you a helpful edge.
Mining Efficiency
By making ores easier to identify, you’ll spend less time squinting at stone textures and more time gathering resources. Perfect for survival players who want maximum efficiency without breaking immersion.
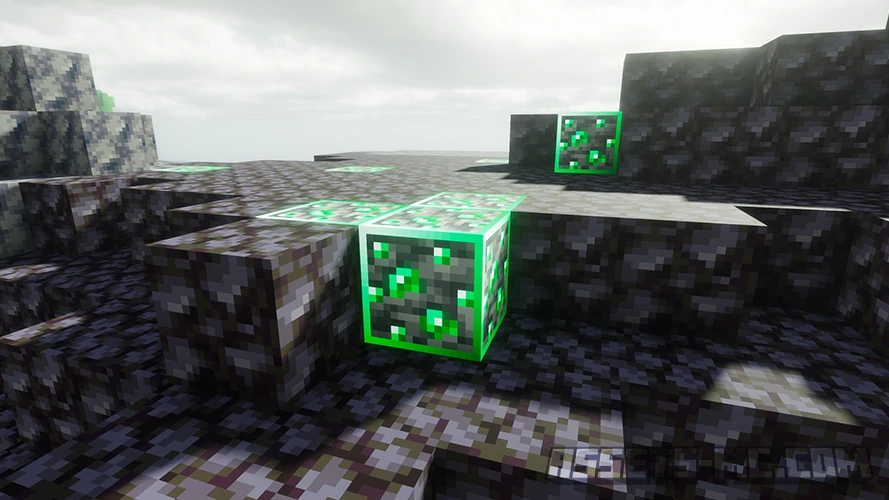
Video and Screen Shots


Comparison to Other Packs
You might be wondering how the Visible Ores Texture Pack stacks up against other resource packs with similar goals. Let’s break it down:
Visible Ores vs. X-Ray Packs
X-Ray Packs let you see through stone to find hidden ores. While powerful, they’re widely considered cheating and are banned on most servers.
Visible Ores, on the other hand, only enhances what you can already see. No unfair advantage—just improved visibility.
Visible Ores vs. Glowing Ores Packs
Glowing Ores Packs add emissive textures that make ores shine in the dark. While effective, they sometimes look too artificial.
Visible Ores strikes a balance by making ores bright without overloading your visuals.
Visible Ores vs. Emissive Ores Packs
Emissive Ores Packs rely heavily on shaders and specific settings to glow. Without those, they lose their effect.
Visible Ores works right out of the box—whether or not you’re using shaders.
Versions INFO
CHECK OUT THESE TEXTURE PACKS

How to Install Visible Ores Texture Pack?
- To use all cool features in this pack, download and install Optifine
- Download and install Complementary Unbound Shaders. Make sure you have set the correct texture resoultion in the shader settings.
- Download the Visible Ores Texture Pack for Minecraft by clicking button bellow.
- Launch Minecraft
- Click “Options” on the main menu.
- In the options, go to submenu “Resource Packs“.
- Click “Open Pack Folder” at the bottom left to see a folder titled “resourcepacks“.
- Put the downloaded ZIP file into your “resourcepacks” folder. Or, just drag and drop it into the Minecraft window to add the pack.
- You will see the pack on the left side off the resource pack selection menu. Unzip the file if you can’t see the pack.
- Hover over the pack thumbnail and click the arrow pointing right.
- Click “Done” and all assets have been loaded.
- Credit for the creation of Visible Ores goes to Techy69
- Our website does not host any files directly. All download links are sourced from the original creators. Every pack is carefully checked and guaranteed to be virus-free, providing a safe and secure experience.
- Do you have any feedback to share? Leave a comment and rate the pack to support the creators!
Free Downloads
CHECK OUT THESE SHADER PACKS

Techy69
Links
Visible Ores FAQ
1. Does the Visible Ores Texture Pack affect performance?
Not at all! The pack is lightweight and designed for smooth performance. Even on low-end PCs, you’ll barely notice a difference in FPS.
2. Is the Visible Ores Texture Pack available for both Java and Bedrock?
Yes. Most download sites offer both Java Edition and Bedrock Edition versions. Just make sure to download the right one for your platform.
3. Can I use it with shaders?
Absolutely! It works beautifully with shader packs like BSL, Sildur’s, and Complementary. The glowing ores actually look even better when paired with realistic lighting.
4. Is it safe to use on servers?
Yes. Unlike X-Ray packs, the Visible Ores Texture Pack doesn’t reveal hidden ores—it only enhances what’s visible. Most servers allow it, but if you’re unsure, check the server rules.